Thursday, July 17, 2014

Orphan Train: A Novel inspired Quilt

"Time constricts and flattens, you know.  It's not evenly weighted.  Certain moments linger in the mind and others disappear." -Christina Baker Kline, Orphan Train: A Novel


Orphan Train: A Novel by Christina Baker Kline is a story that switches between past and present to tell the story of two women with similarities who are brought together.  Vivian tells Molly her story of leaving New York City in 1929 on the orphan train to make her way to find a new family in Minnesota.  It is an interesting piece of historical fiction that will hold your attention from the very first page. 

One of the skills Vivian/Niamh learns is how to sew.  Sewing is important to Vivian throughout the book, and she even joins the quilting group in her town at one point in time.  Her quilting inspired me to give quilting another try.  

Materials:
-Light Colored Scrap Fabric
-Dark Colored Scrap Fabric
-Ruler
-Pencil
-Sewing Scissors
-Thread
-Sewing Machine

Directions:

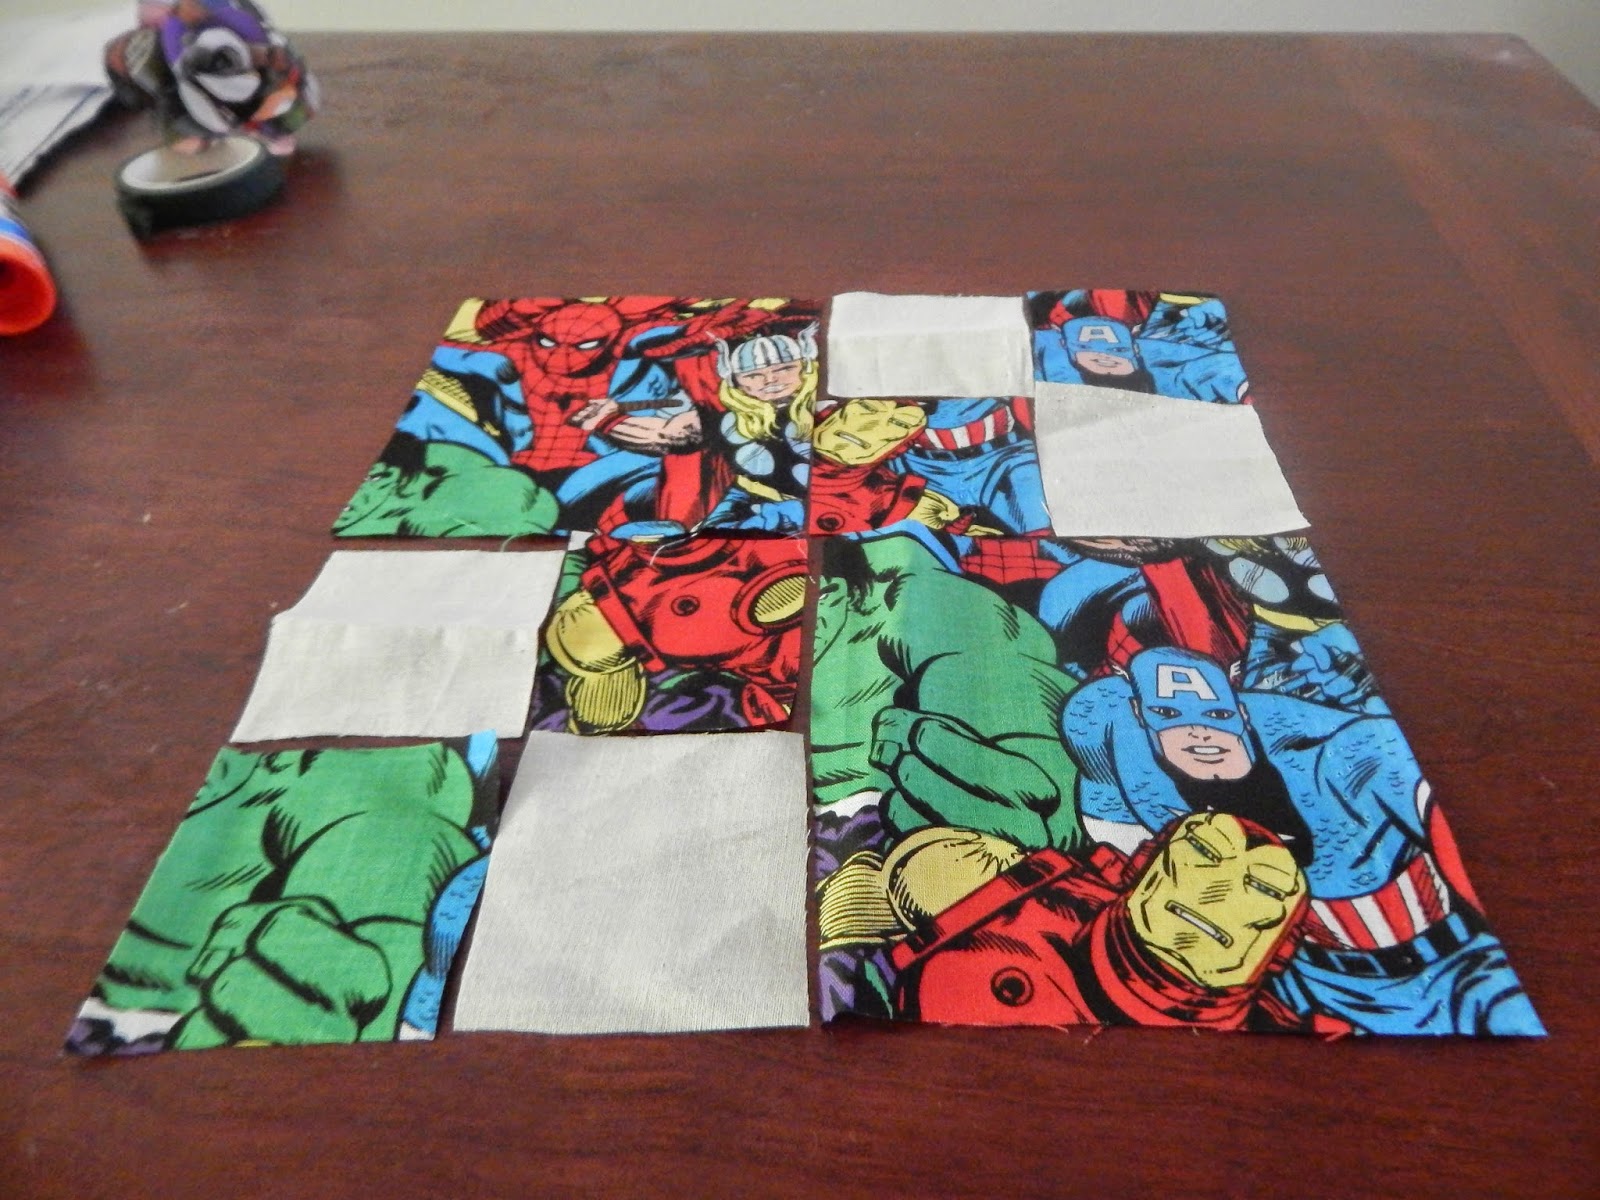
  1. Measure out squares of dark and light colored fabric 4 1/2 by 4 1/2 inches. Eight of each for the piece above.
  2. Cut 4 of each of the pieces into four squares, 2 1/4 by 2 1/4.
  3. Lay out the pieces in the following manner. Pin together and sew together.
  4.  Make 2 squares like the one above and two with the light color as the main fabric.  
   5. Attach all together to get the pattern.
6. Keep going if you want a full quilt or big wall hanging.  Sew pieces together and complete with binding, backing, and batting.

My fabric might be more updated, but the concept of quilting hasn't changed over time.


Monday, July 14, 2014

Companion Cube Plush

"The Enrichment Center is required to remind you that the Weighted Companion Cube cannot talk. In the event that it does talk the Enrichment Center asks you to ignore its advice." -GLaDOS, Portal


The first time I heard about the video game portal I was at a wedding with my boyfriend. I had been talking about how good the cake was going to be (I had sampled the flavors at the bridal shower) and because he waited so long he said that the cake was a lie. My friend and I had to ask what he was talking about, but the groom laughed when we told him.  When I found this post on creating a portal cube, I knew I had to make one for the boyfriend. 

Note: The colors on the pattern are not the colors shown in the picture on the tutorial but are the colors on my plush.  Also look carefully in the comments section to see part II of the tutorial, I missed that part and had to guess.  Not hard to guess how to finish in though. This would make a great pincushion, or use only rice to create a fun heating pad (ironic considering it was thrown into an incinerator).


The boyfriend also showed me this clip.  So Portal was created by ghosts?  

Friday, July 11, 2014

Plastic Bottle Boats

"Here, Fridays were dedicated to the two Bs- Beach and Boats." -Laura Miller, Butterfly Weeds

Nothing is better than a Friday at the beach. However sometimes waiting to go to the beach can seem like forever.  If you are looking for something to keep the kids entertained as you are getting ready for the beach, here is a great project that you can race once you get to the beach. A huge thanks to my little cousins for making these with me!


Materials:
  • Plastic Bottle
  • Duct Tape
  • Plastic Bag
  • Straw
  • Permanent Markers
  • String
  • Scissors
  • Rocks

Directions:
1. Cut a hole in the the bottle to create a cockpit (hole in the middle of the boat where people or legs go) to the boat. 
2. Use duct tape to create a keel (the thing at the bottom on the boat) and attach it below the cockpit.
3. Using duct tape attach the straw to create the mast (the thing the sail will be attached to).
4. Cut out a sail from the plastic bag.  Attach the sail to the mast using the duct tape.
5. Attach any string or additional plastic bags as wanted. 
6. Use permanent markers to decorate the boat.
7.  Add rocks to the bottom of the boat to stabilize it while on the water.

The boats do best with low to no waves and a handful of rocks.


Thursday, July 10, 2014

Magic Wands: Harry Potter

"The mind is not a book, to be opened at will and examined at leisure." -J.K. Rowling, Harry Potter and the Order of the Phoenix

One of my friends just requested that we have another Harry Potter Party, however she has a wedding to get ready for and summer always seems to be busy, this party needs to be postponed.  To satisfy the Harry Potter craving, a handmade wand (almost as awesome as Ollivander's) will have to do. 


Materials:

  • Hot Glue Gun
  • Dowel
  • Paintbrush
  • Black/Brown/Tan paint

Directions:
  1. Shape hot glue around a dowel to create a handle for your wand. Let dry.
  2. Paint your wand the color of your choice.
Easy and looks awesome!

Handle Detail


Tuesday, July 8, 2014

Magazine Rolled Paper Bowl

"If we can't reuse or recycle it, we shouldn't be making it." -Paul and Ellen Connett, "Priorities for a Movement"


A few months ago I made a waste basket out of magazines.  This uses the same idea, but I found a way to make my rolls and base more sturdy.  To make the rolls more sturdy start at a corner of the magazine page and start rolling tightly and diagonally.  Glue off the end to create a tube. This should look something like a long straw when completed.  Then flatten the tube to create a sturdy strip to work with.  One of these strips should be enough to roll up and glue off to create one roll.  To make the base, keep wrapping strips around until you get the size of the base you need.  To make the bowl shape I hot glued the rolls to the base (like seen in the waste basket post) and used a plastic bowl as my form.


As long as you don't over fill it, it makes a great candy dish or just a fun centerpiece.


Sunday, July 6, 2014

The Art Of Fielding Wall Hanging

 "Deep down, he thought, we all believe we're God.  We secretly believe that the outcome of the game depends on us, even when we're only watching-on the way we breathe in, the way we breathe out, the T-shirt we wear, whether we close our eyes as the pitch leaves the pitcher's hand..." -The Art of Fielding, Chad Harbach

The Art of Fielding by Chad Harbach is a great book about life, college, and baseball.  The book touches on how friends can become your family and home is where your heart is.  A good read that makes you think about who and what is important to you, but it could have used more baseball!  

Since Westish College and the baseball program were home to the characters in this book, I decided to pay homage to that by creating this door hanging.

Materials:

  • Placemat
  • Ribbon
  • Wire
  • Black, brown, and red paint
  • Paint brush
  • Hot glue gun
  • Scissors
Directions:
  1. Cut out a home plate shape from the placemat.
  2. On the back (white part) of the placemat paint on the brown and black outside to give the illusion of dimension. Let dry.
  3. Paint the red stitch lines on the plate. Let dry.
  4. Paint the phrase "There's no place like home" on the plate. Let dry.
  5. Make a bow out of ribbon the color of your choice. (Team colors are always fun!)
  6. Attach bow to the plate with hot glue.
  7. Attach wire to the back of home plate with glue to create a way to hang it up.
If the placemat is flimsy you might need to reinforce it with heavy cardboard of dowels.


And some other baseball inspired projects I made that didn't make the cut:
Shrinky Dink Team Inspired Earrings
Polymer clay baseball pin
Hank the Dog Painting