Wednesday, October 22, 2014

Soda Can Basket

"...much of what was said did not matter, and that much of what mattered could not be said."    -Katherine Boo, Behind the Beautiful Forevers: Life, Death, and Hope in a Mumbai Undercity

This months book club book was Behind the Beautiful Forevers: Life, Death, and Hope in a Mumbai Undercity by Katherine Boo.  This was a great look into life in the Mumbai undercity and the disparities in one of the largest cities in the world.  One of the characters in the book is Abdul, who buys and sells recycling.  His profession inspired this recycling project.


Materials:
  • Soda can
  • Scissors
  • Two different colors of plastic grocery bags
  • Hot glue gun
Directions:
  1. Cut the top off the soda can.
  2. Cut 16 spokes in the can. All the way down to the base of the can.
  3. Cut one long strip out of the grocery bag.  Do the same thing to the other grocery bag.
  4. Tuck the end of the grocery bag strip behind one of the spokes.  Tuck the next grocery bag strip behind the next spoke. 
  5. Weave the strips around the spokes.  Make sure to pull tight for the best basket shape.
  6. Weave up to one inch from the top. Fold the can spokes down over the strips.  
  7. Cut off any excess of the grocery bag strip.  Tuck behind the folded over spoke.
  8. Cut three strips of grocery bag about 6-7 inches long.
  9. Tuck  the ends of the three strips under one of the links of the woven basket (leaving 1-2 inches over hanging).  Do the same on the other side.
  10. Fold the excess strip up, and wrap excess grocery bag strip around to cover the handle.
  11. If you want to decorate the basket, tie a bow (or two) and hot glue them onto the basket.
Enjoy your very recycled basket!


Friday, October 17, 2014

Photo Magnets

"Taking pictures is savoring life intensely, even hundredth of a second." -Marc Riboud


For all of the scrapbookers out there, you might be able to relate to me.  I feel that I take a lot of photographs, but some of the more "artistic" ones I don't want to put in my scrapbook, because that is more of a story so it involves more people, action, and setting shots.  I have been struggling with what to do with these pictures, until I got a coupon from Shutterfly for free photo magnets.  I think this was a great way to find a place in my home for some of these photographs.  There are lots of great websites or store that can do turn photos into magnets, so explore and see what you can create.

Monday, October 13, 2014

Crayon Drip Pumpkin Dish

"Fall makes me think that if I fail horribly at this art thing, and then fail horribly with this writing thing, I'll go run a pumpkin patch." -Tyler Hojberg

Getting ready for Halloween, I wanted to make a pumpkin dish.  This one is colorful and fun!

Materials:

  • Foam pumpkin
  • White acrylic paint
  • Crayons
  • Paint brush
  • Hair-dryer
  • X-acto knife
Directions:
  1. Paint the pumpkin white. Let dry.
  2. Cut the pumpkin in half.
  3. With each crayon (individually works best) melt it using the hairdryer so it drips down the pumpkin.  
  4. Continue around the entire pumpkin.
  5. Place a cup in the center with dip or whatever you want to serve! Enjoy!

Sunday, October 12, 2014

Book Club Shirts: Part Two

"What's the point of having a book club if you don't get to eat brownies and drink wine?"       -Jami Attenberg, The Middlesteins

For me what is the point of having a book club if there is not a craft involved?  Sometimes I think book club members specifically pick books to see if I can come up with a project.  I have made stretches, but I have not failed yet.  Another one of the book club members (finally) created her shirt and based it off of The Mortal Instruments series.  Of course I also found a Harry Potter themed shirt with a tutorial over created by the Stay at Home Artist, so that had to be made as well.  Check out her tutorial to create your own Patronus shirt.  


To create the Moral Instruments shirt you will need:
-Black T-Shirt
-White Fabric Paint
-Foam Brush
-Freezer Paper
-Scissors
-Iron
-Cardboard

Directions:
-Find an image of a rune and print it onto computer paper.  The rune shown on the shirt is for angelic power.
-Cut out the rune to create a stencil.  That means cut out the part that is printed and save the rest.  The middle section of this rune was saved for when it was time to iron on the stencil.
-Iron the waxy side of the freezer paper to the shirt.  For this rune we ironed the main stencil part first and then ironed the middle part of second.
-Take white fabric paint right onto the stencil and spread evenly across the design until every open piece of the stencil is covered. Let dry overnight.
-Remove the freezer paper and enjoy your shirt!


Friday, October 10, 2014

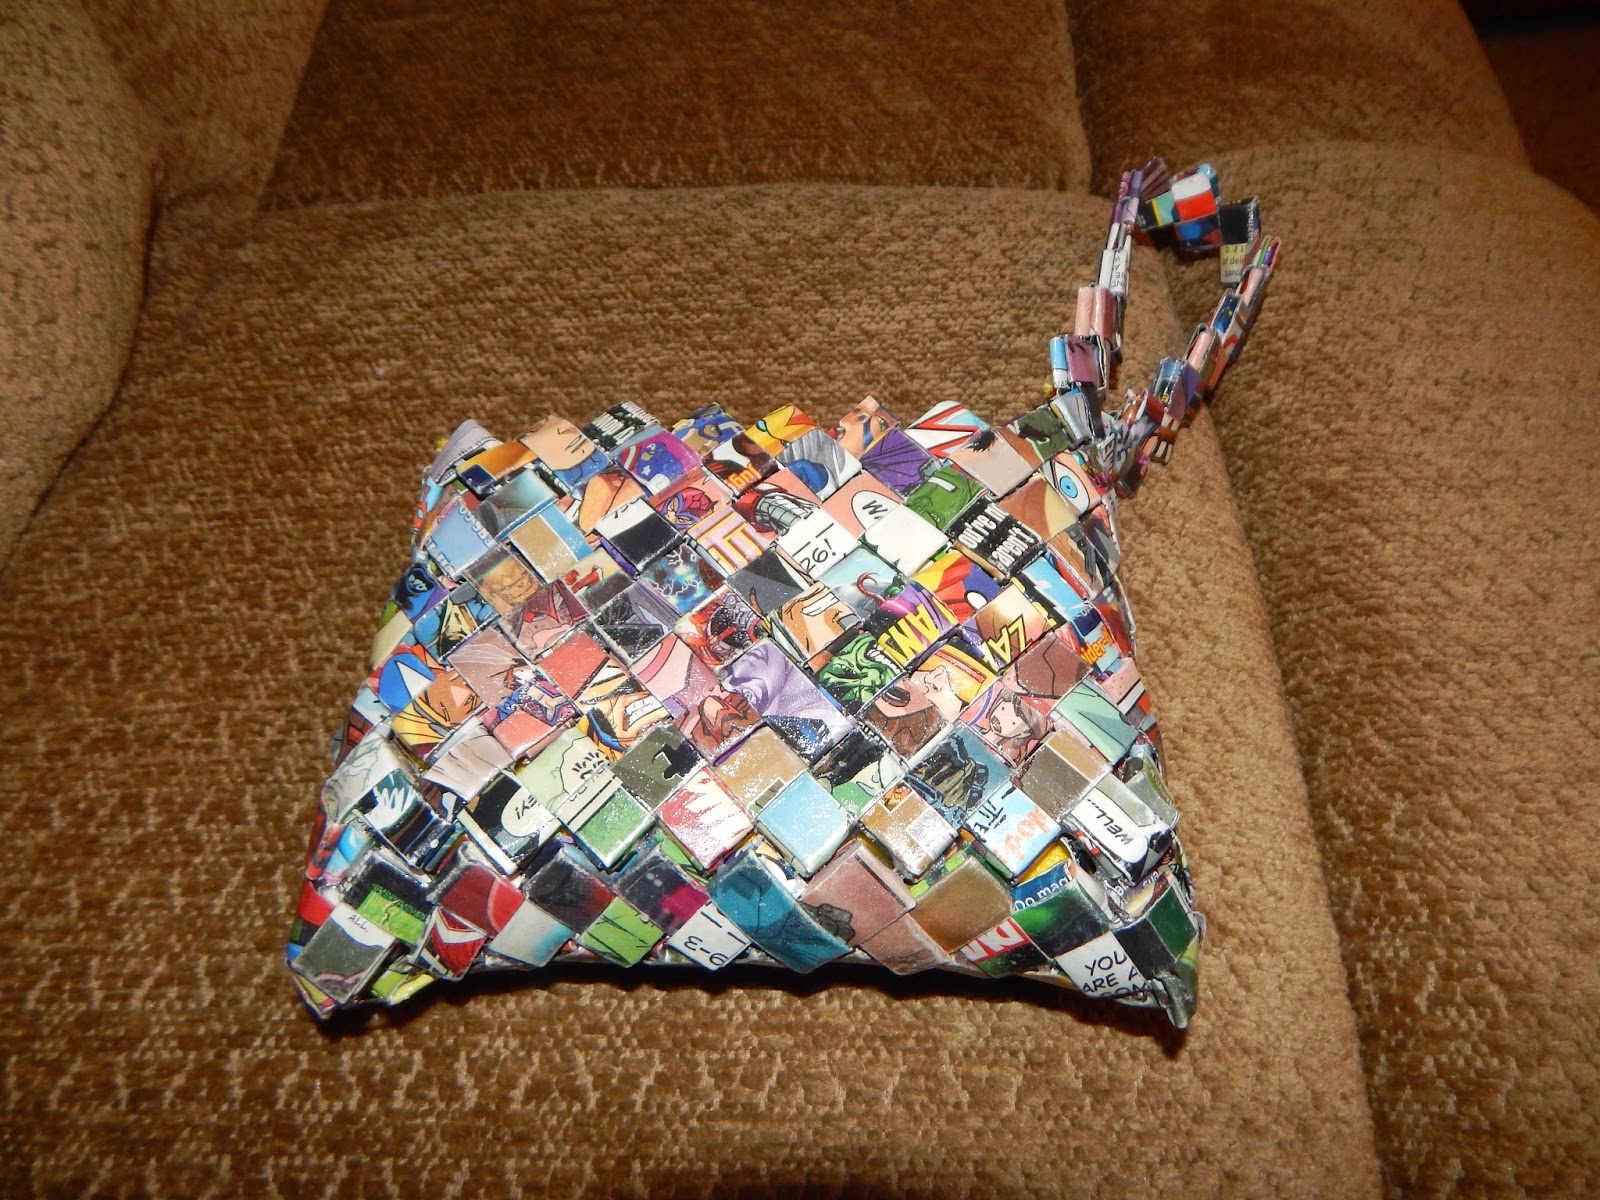
Comic Book Purse

"Don't treat your heart like an action figure wrapped in plastic and never used.  And don't try to give me that nerd argument that your heart is a 'Batman' with a limited-edition baterang and therefore if it stays in its original packaging it increases in value." -Amy Poehler

I loved my comic book coin purse, but I am horrible at using coin purses.  I decided to make a bigger version of the comic book coin purse and add a strap to create my very own comic book purse.  My favorite heroes are all on it: Wasp, Wolverine, Ant-Man, Prof. X, Captain America, The Hulk, Iron Man, and even Quicksilver makes an appearance.


Materials:
  • Comic Books
  • Ruler
  • Scissors
  • Needles (large head and regular head)
  • Embroidery Floss
  • Thread
  • Zipper
  • Felt
  • Mod Podge
  • Paint Brush
Directions:
  • Follow the directions from the coin purse tutorial, but instead of twenty links long make the chain forty links long. This will take 270 comic book page rectangles.  There will be a total of six chains instead of three.  Attach the chains together and sew the bottom of the purse together as the tutorial shows.
  • Make a separate chain of thirty links for the handle and attach that to the purse base.
  • Measure out a piece of felt that would fit as a pouch inside the purse.  Complete and attach the inside pouch the same way as the coin purse tutorial.
  • Mod Podge the entire outside of the coin purse and the handle to preserve the paper.  Let dry. 
My purse (and actually reading comics) will have to make do until the next Avenger's movie comes out in May.

Sunday, October 5, 2014

Book Page Pumpkin

"Autumn...the year's last, loveliest smile." -William Cullen Bryant

Happy Fall everyone!  The start of October means that I can bring out all of my pumpkin/Halloween decorations.  Dollar tree foam pumpkins and material around my house help inspired this book themed pumpkin.


Materials:

  • Foam Pumpkins
  • Book Pages
  • Green Leafs
  • Spanish Moss
  • Mod Podge
  • Paint Brush
  • Hot Glue Gun
  • Scissors
Directions:
  1. Cut out squares of book pages, about 1 inch by 1 inch.
  2. Mod Podge the pages onto the pumpkin. Let dry.
  3. Hot glue the leafs onto the pumpkin.
  4. Hot glue the Spanish moss onto the pumpkin.

Add a frame quote from a book or a poem to place behind the pumpkin to complete the look.  The poem in my frame is "Fire and Ice" by Robert Frost.

Monday, September 1, 2014

Wall Wire Tree

"A mind needs books as a sword needs a whetstone, if it is to keep its edge." -George R.R. Martin, Game of Thrones

After watching the first two seasons of Game of Thrones, I decided that I wanted to read the books.  Since I haven't read the second book yet, all I can say is that the first season sticks very closely to the books.  I did enjoy the fact I caught on to a few more things/learned a few more things from reading the book.  While in the process of reading the book I made the wire tree and it reminded me of the weirwood.  The fun thing about about this project is you can either just use it as a wall decoration or use it as a jewelry tree. 


Materials:
  • Wire
  • Wire Cutters
  • Needle Nose Pliers
Directions:
  1. Twist spirals onto the ends of two lengths of wires.
  2. Twist the wires together and shape the ends with the spirals into branch shapes. 
  3. Twist another spiral onto an end of wire and twist that onto the section of wire you already twisted.

    4. Keep adding sections of wires together until the tree top is formed.
    5. Repeat this same process but attaching to the trunk of the tree upside to create the 
         root system.